Designing exo-1: An Instrument, Not a Gadget
The concept renders for Exo's printed parts: a bone-white and warm-grey body, one signal orange, a glowing green approve key, tiny lowercase labels and exposed screws. Why each choice, what each part does, and what's still only a render.
Most crypto hardware looks like a vault, and most AI gadgets look like a pebble. We wanted Exo to look like neither. Exo is something you operate all day, with your hands, often without looking, so we designed it the way good music and lab equipment is designed: as an instrument. Every control has one job, one colour and one label, and nothing on the surface is decoration.
These are concept renders, not photographs. We wrote a design brief for the five 3D-printed parts and generated the images from it with an image model, so the people in them are invented and none of these parts has been printed yet. The working prototype today is a bare Raspberry Pi 4, display glasses, earbuds and a breadboard of buttons. The renders are the target that prototype is growing into.
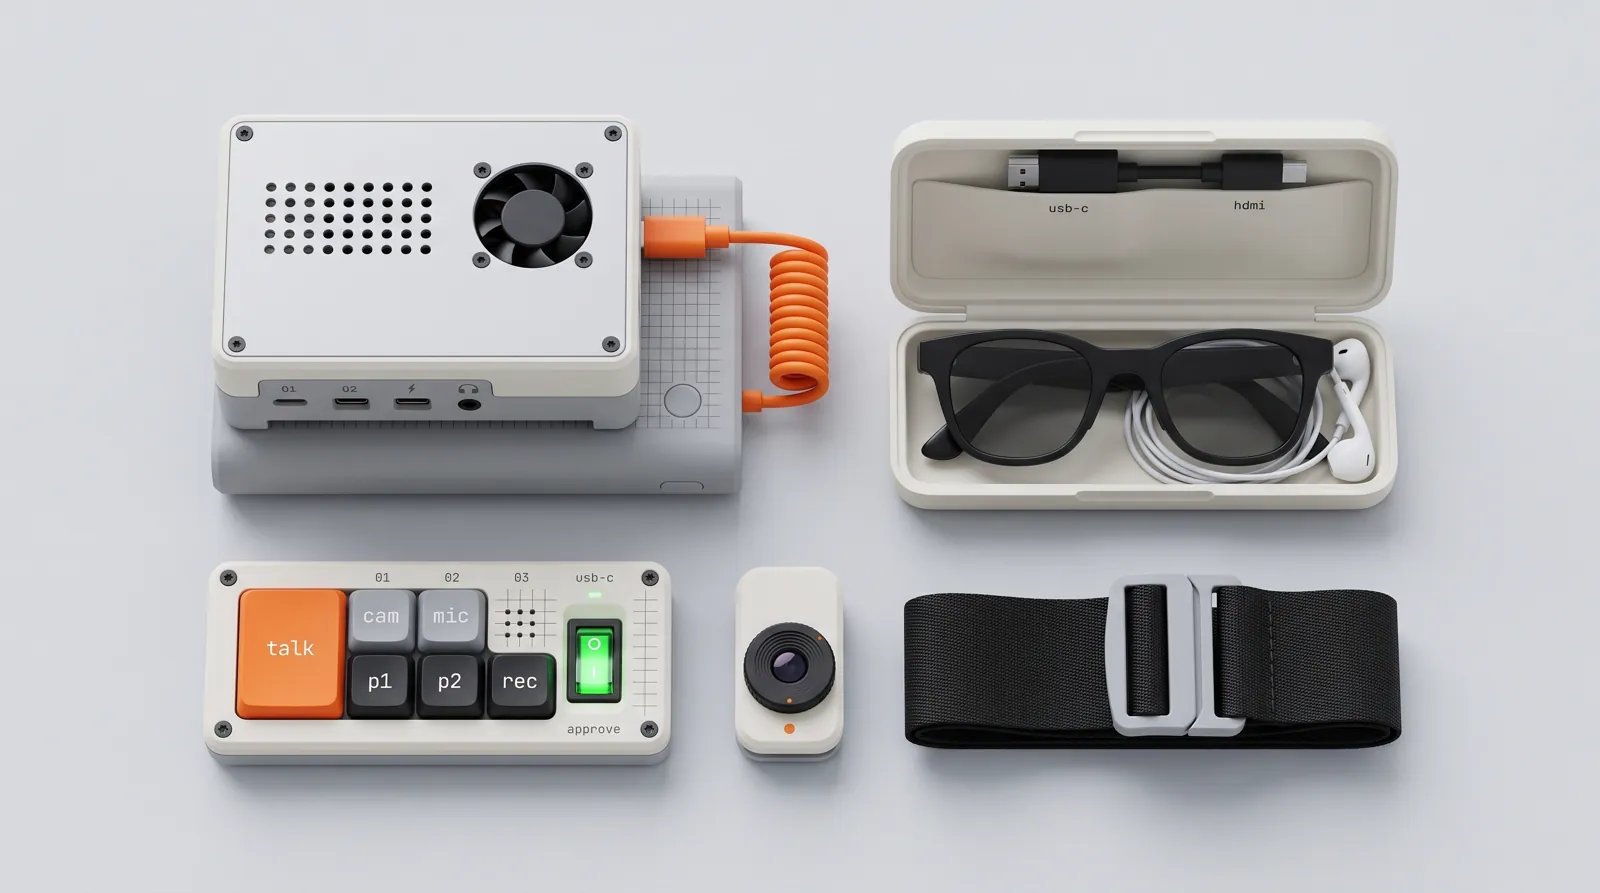
The design language
| Choice | What it looks like | Why |
|---|---|---|
| Bone white and warm grey | 3D-printed shells in #EDEBE6 and #9A9893, with a few bead-blasted aluminium-look plates |
Calm, neutral and honest about being printed. It reads as a tool, not jewellery |
| One signal orange | #FF5A1F, used only on the most important control (talk) and a couple of pull-tabs |
If everything shouts, nothing does. Orange means "this is how you start" |
| Green means send | The approve key is a clear mechanical switch that glows green | The one action that moves money gets its own colour, its own shape and its own corner of the panel |
| Red means recording | A small red dot labelled rec |
For the people around you: the camera and mic are visible when they're on |
| Tiny lowercase labels | Monospaced labels next to every control and port: talk, cam, mic, p1, p2, rec, approve, usb-c, hdmi |
You learn the device by reading it, and the labels still make sense on camera |
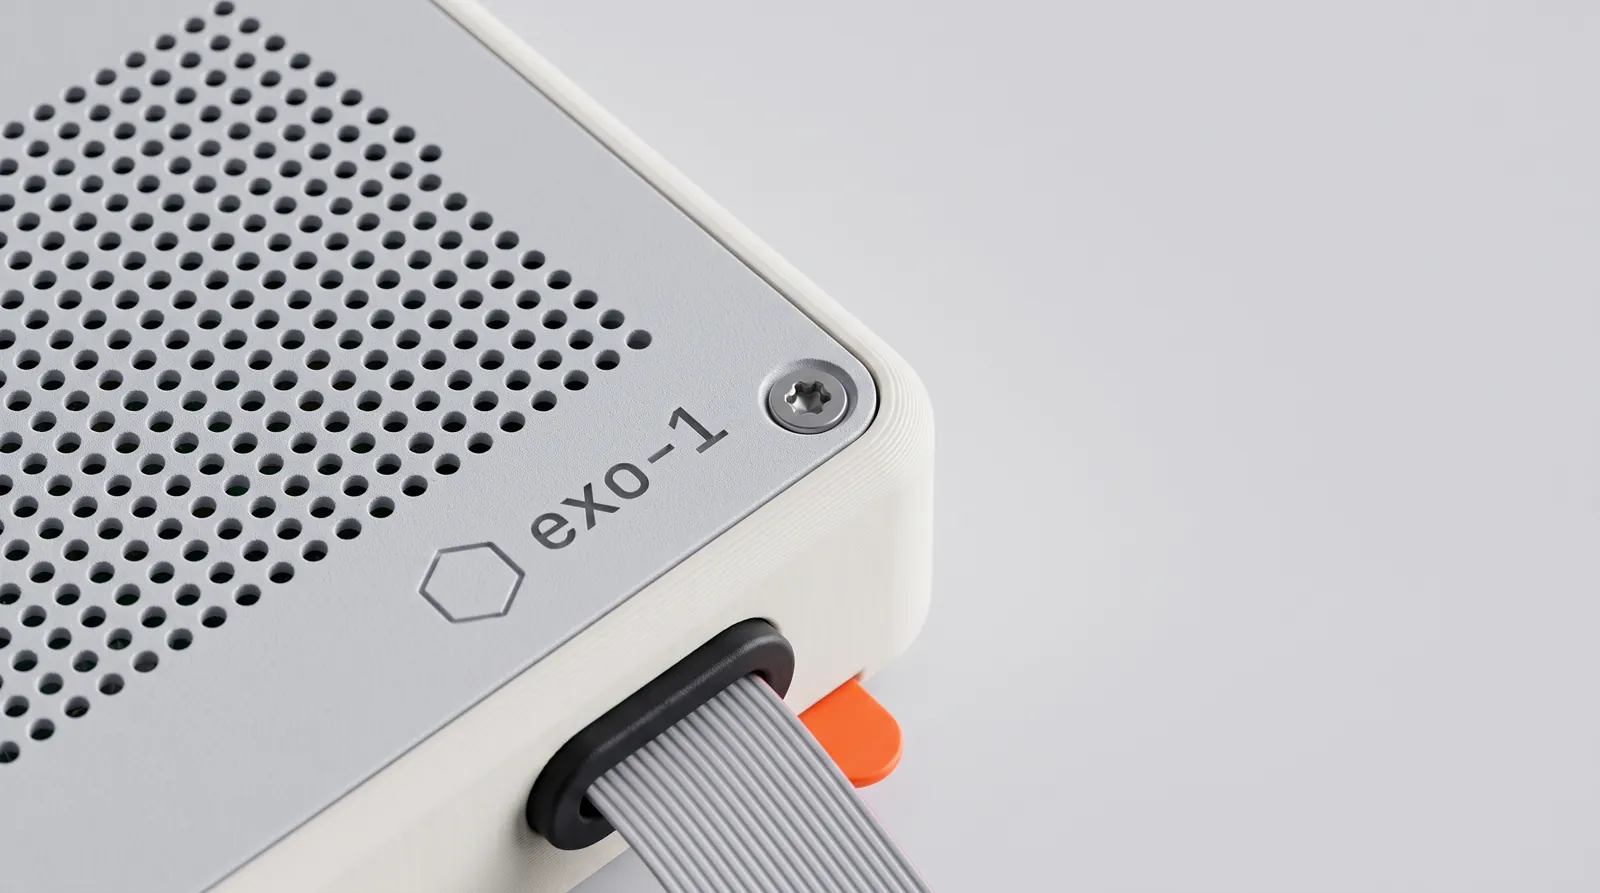
| Exposed screws, visible grid | Small torx screws at the corners and a faint engraved grid on large faces | It's meant to be opened, repaired and modified. The grid hints at the measurements underneath |
| Uniform 2 mm radii, flat faces | Every corner the same radius, crisp seams | Precision is what separates a printed instrument from a printed prototype |
| A mark, not a theme | A small hexagon outline beside the model name exo-1 |
Enough to identify it, quiet enough that the device is about you, not the logo |
The five parts
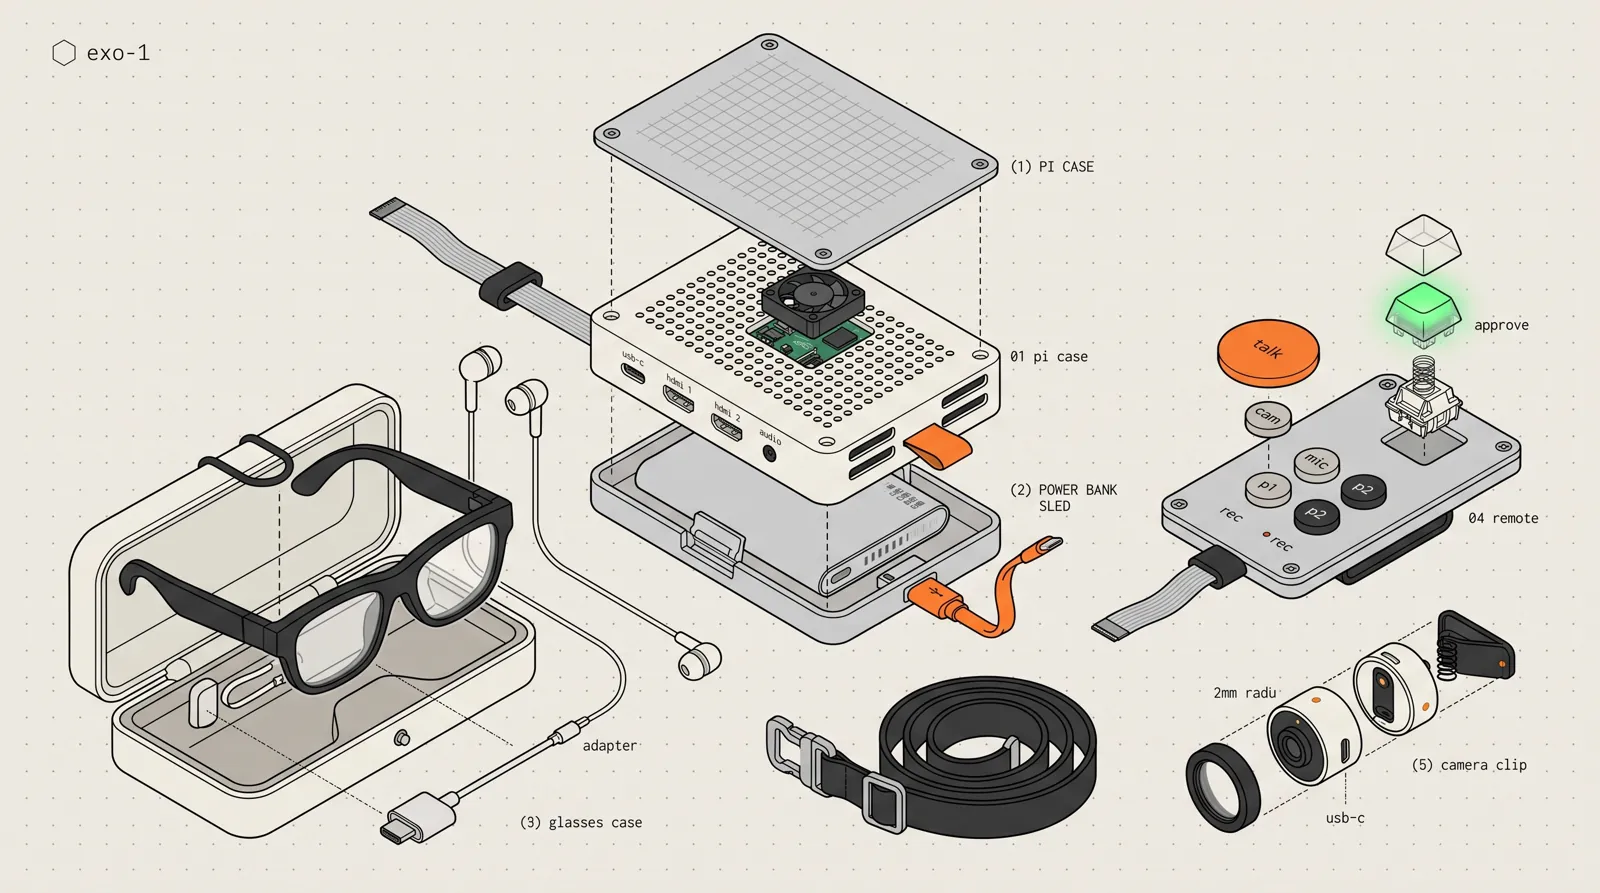
01 · Pi case and power sled
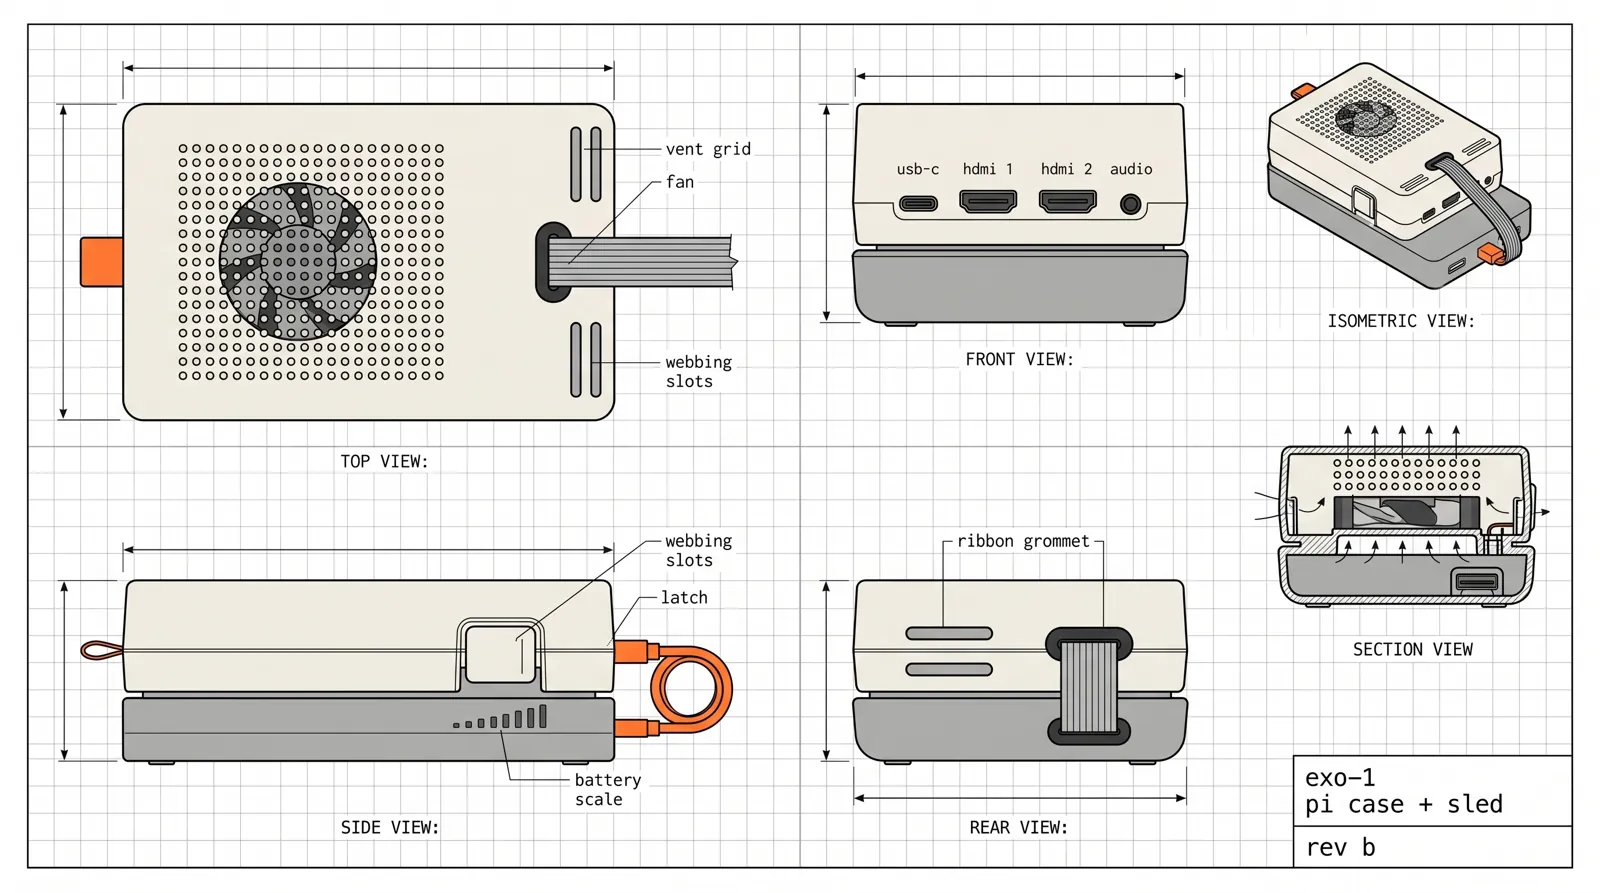
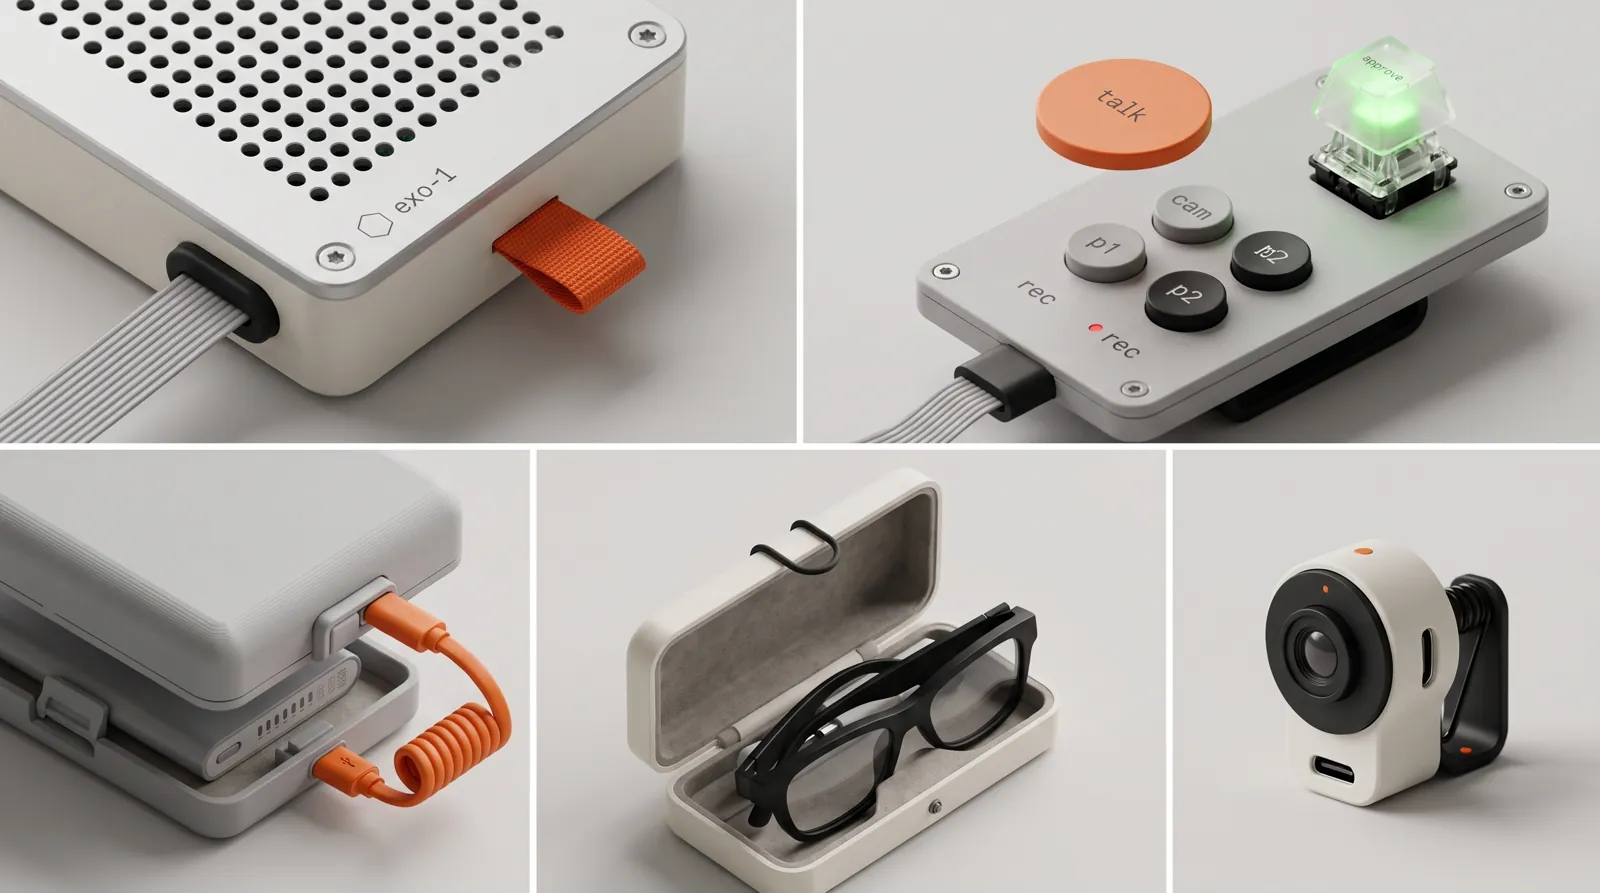
A flat slab around the Raspberry Pi 4: a bone-white body, a light-grey vented lid over a small fan, and every port labelled on one long side. The power bank rides underneath in a grey sled that latches on, joined by a short coiled orange USB-C cable, with a battery scale printed on the side. The ribbon cable to the remote leaves through a rubber grommet, and two webbing slots let the slab ride in a pouch at your hip.
02 · Remote panel
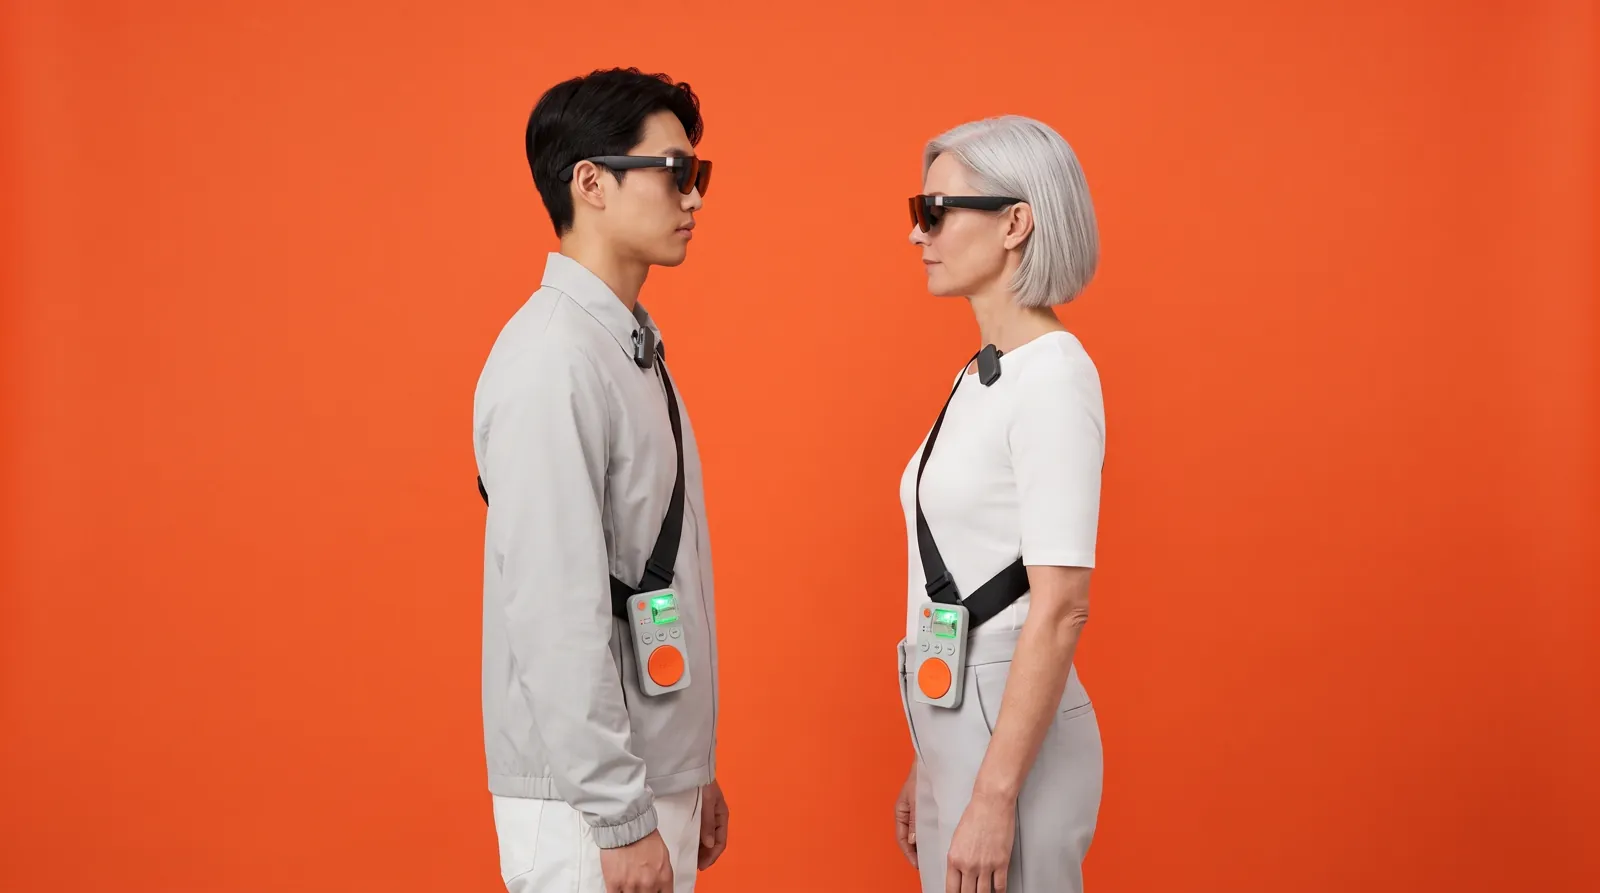
The part you touch most, clipped to the strap at chest height under your thumb. The layout follows how often you use each control. Talk is the biggest key and the only orange one. Cam and mic are grey. P1 and P2 are small and black because they're programmable. The rec light sits where bystanders can see it. And alone at one end, on its own raised pad, is the approve key: a mechanical switch in a clear housing that glows green when a transaction is waiting.
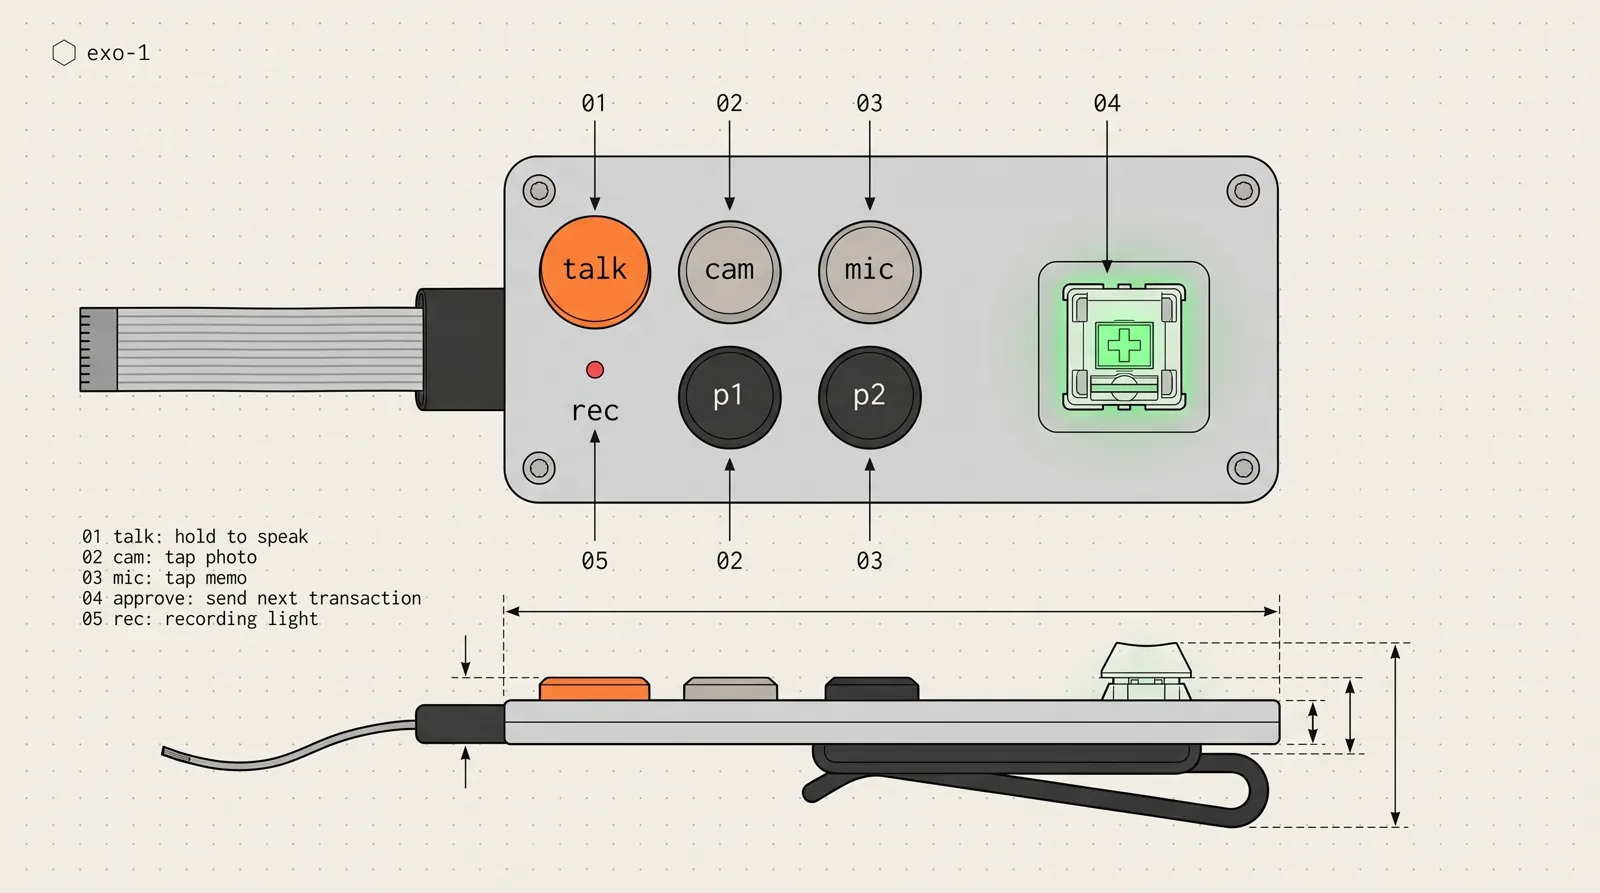
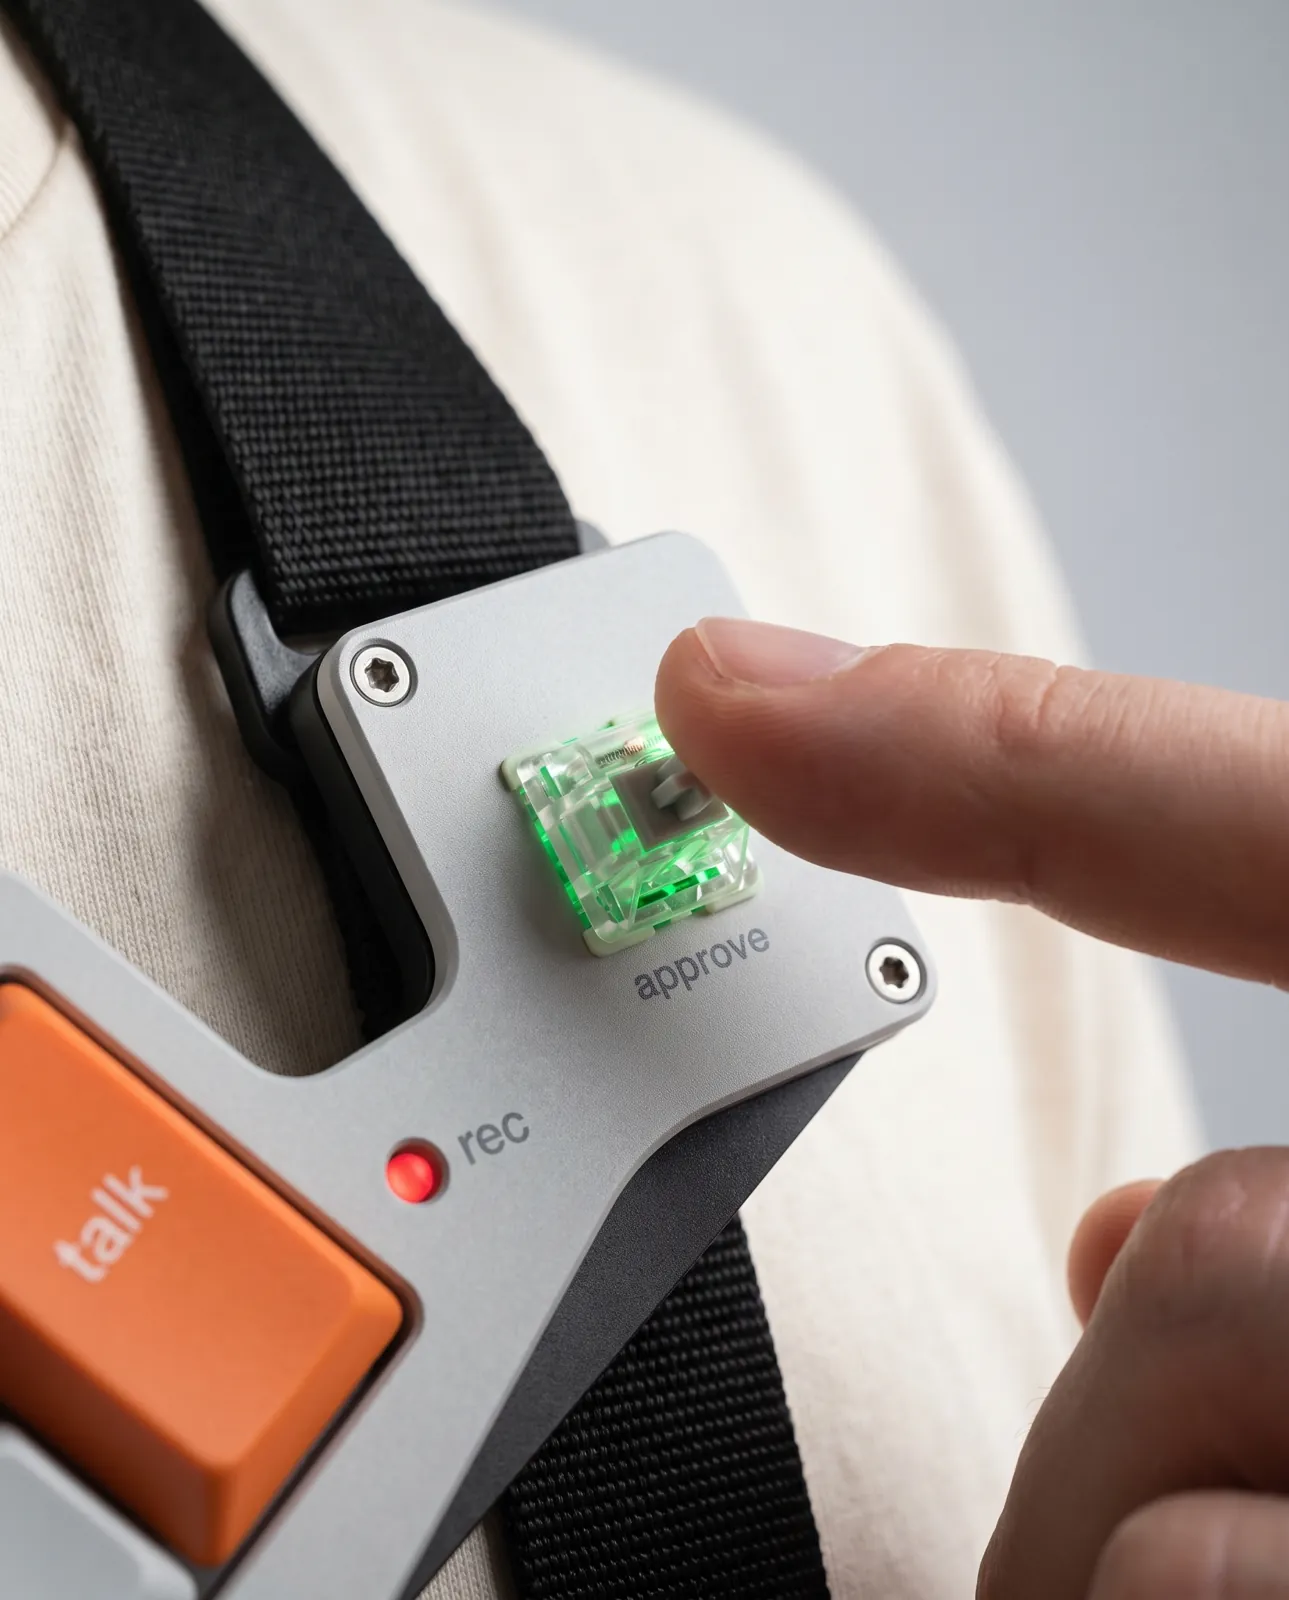
The approve key is the design's centre of gravity. In software, approving a payment is a button that looks like every other button. On Exo it's a physical switch with travel, a click and a light, set apart from everything else, and nothing an AI agent writes can press it. Our post on NOWNodes and the approve key explains the security reasons. The design reason is simpler: the most consequential action should be the most deliberate one.
03 · Glasses case
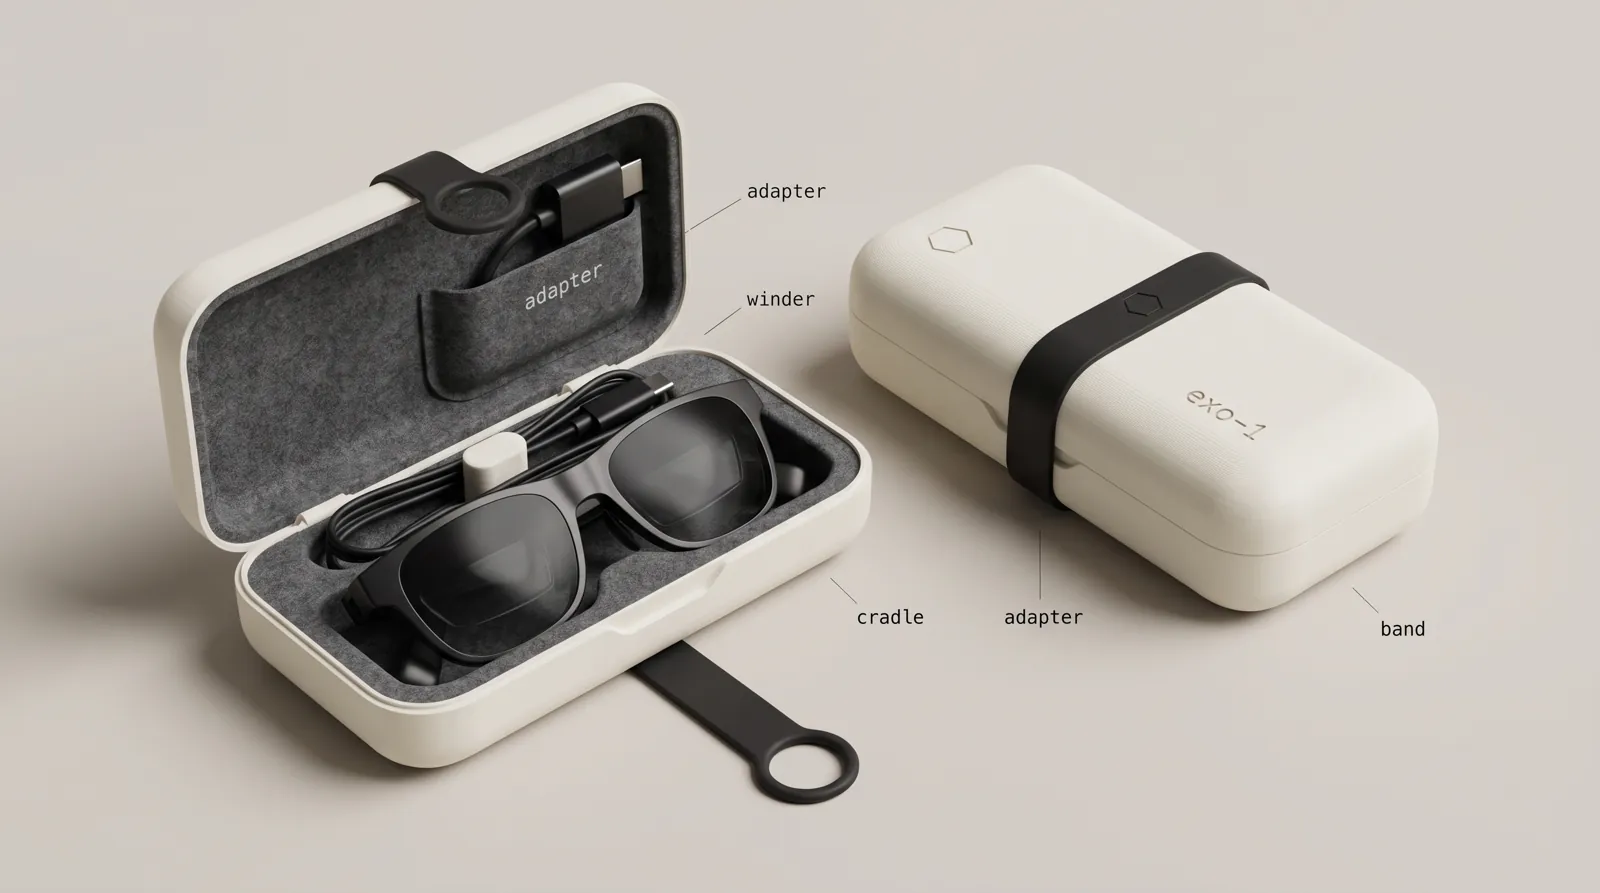
A bone-white clamshell held shut by a black rubber band, with a felt cradle for the display glasses, a post to wind the cable around, and a labelled pocket for the HDMI-to-USB-C adapter. It's the part people see when you sit down, so it's the most "finished" object in the kit.
04 · Camera clip
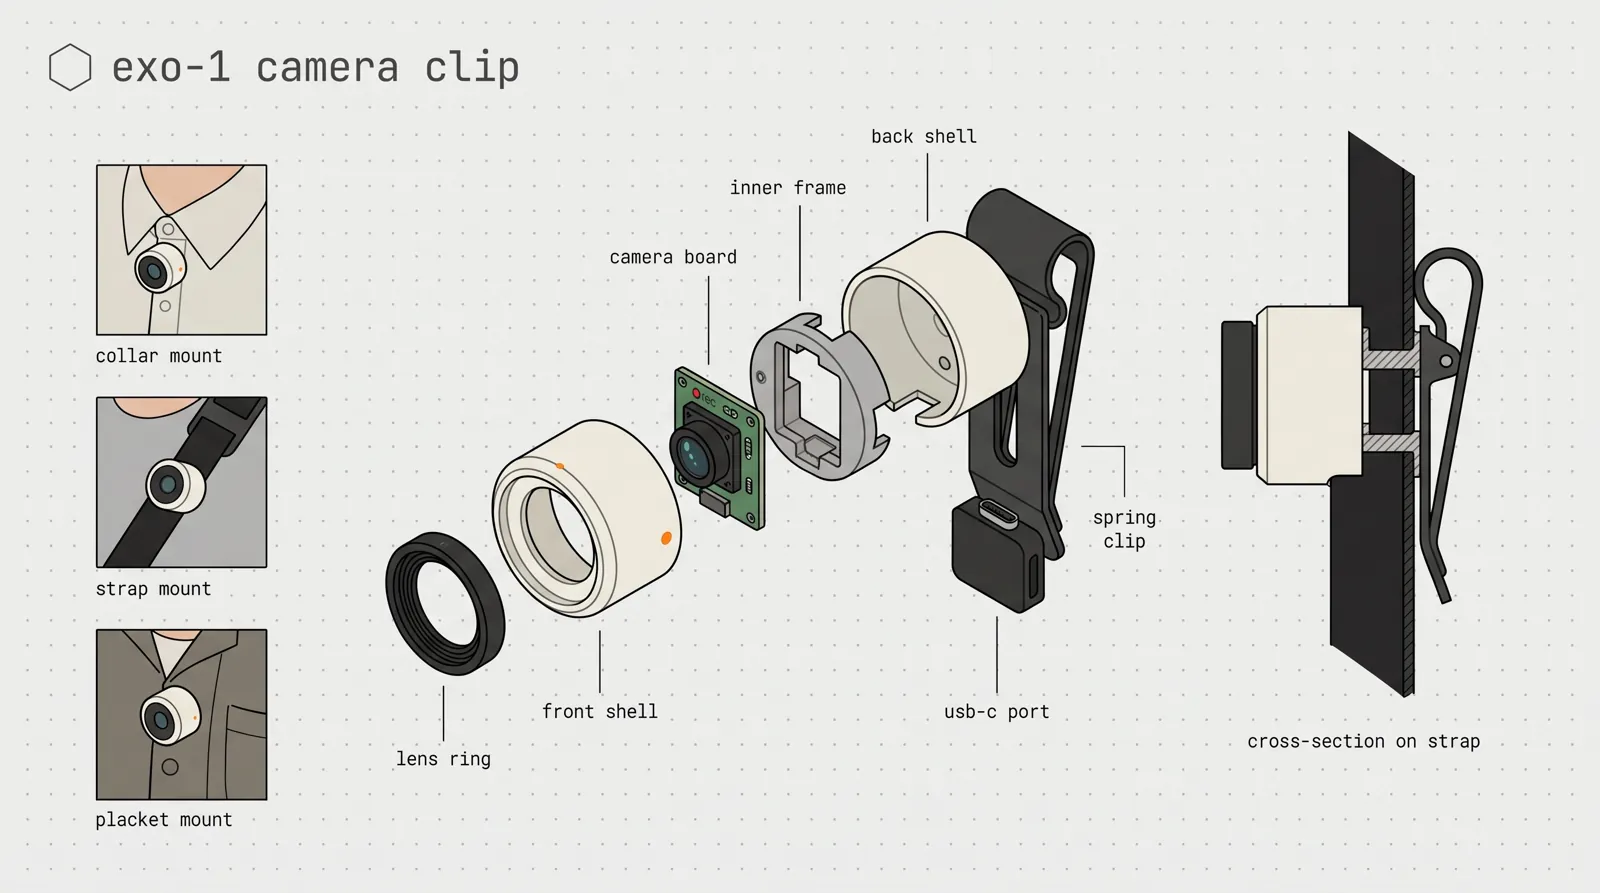
A bone-white cylinder about the size of a thumb tip, with a black lens ring, a tiny orange index dot so you know which way is up, a spring clip for a collar, strap or placket, and a USB-C port underneath. It takes a photo or a clip only when you press cam, and the rec light tells everyone when it does.
05 · Sling strap
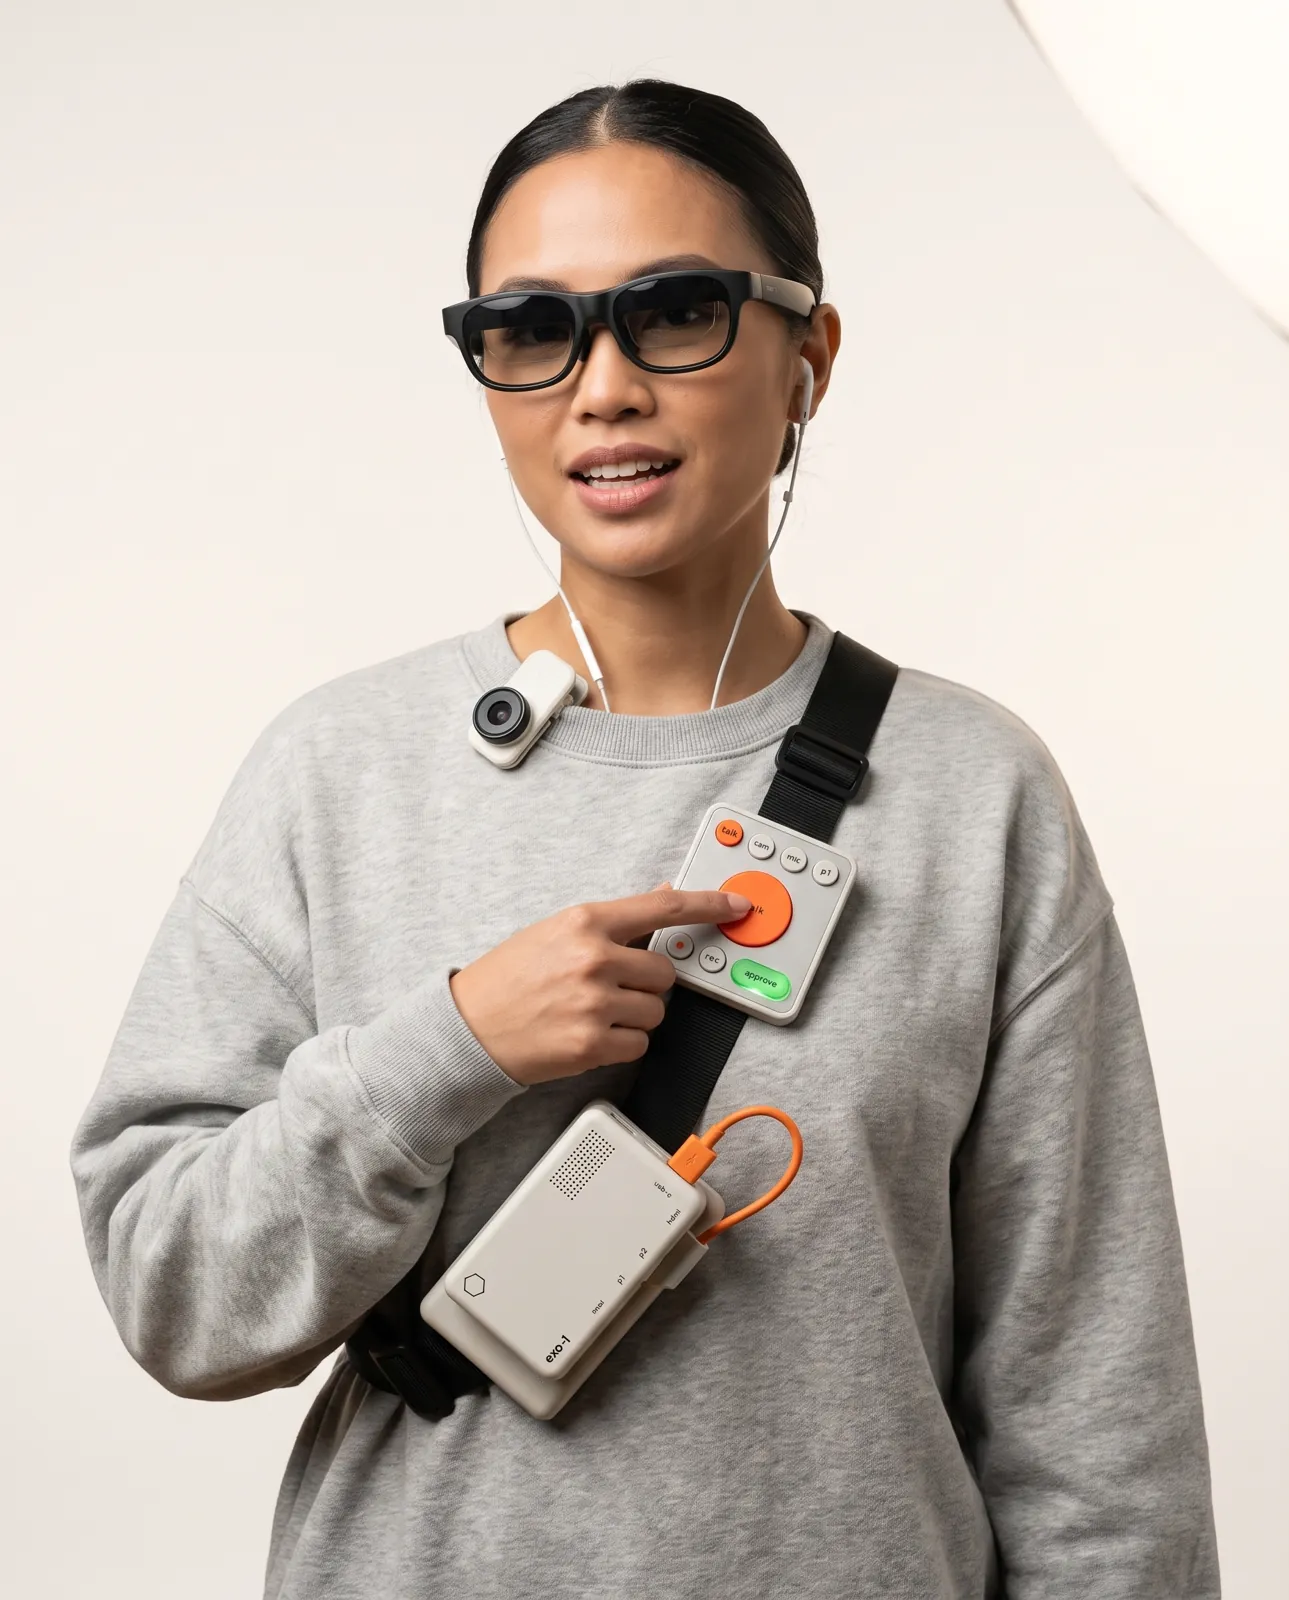
A black nylon sling worn across the body, with a grey buckle. The remote clips to it at the chest, the camera sits on the collar, and the Pi slab rides in a pouch at the back hip, with the ribbon cable running inside the strap.
Made to be printed
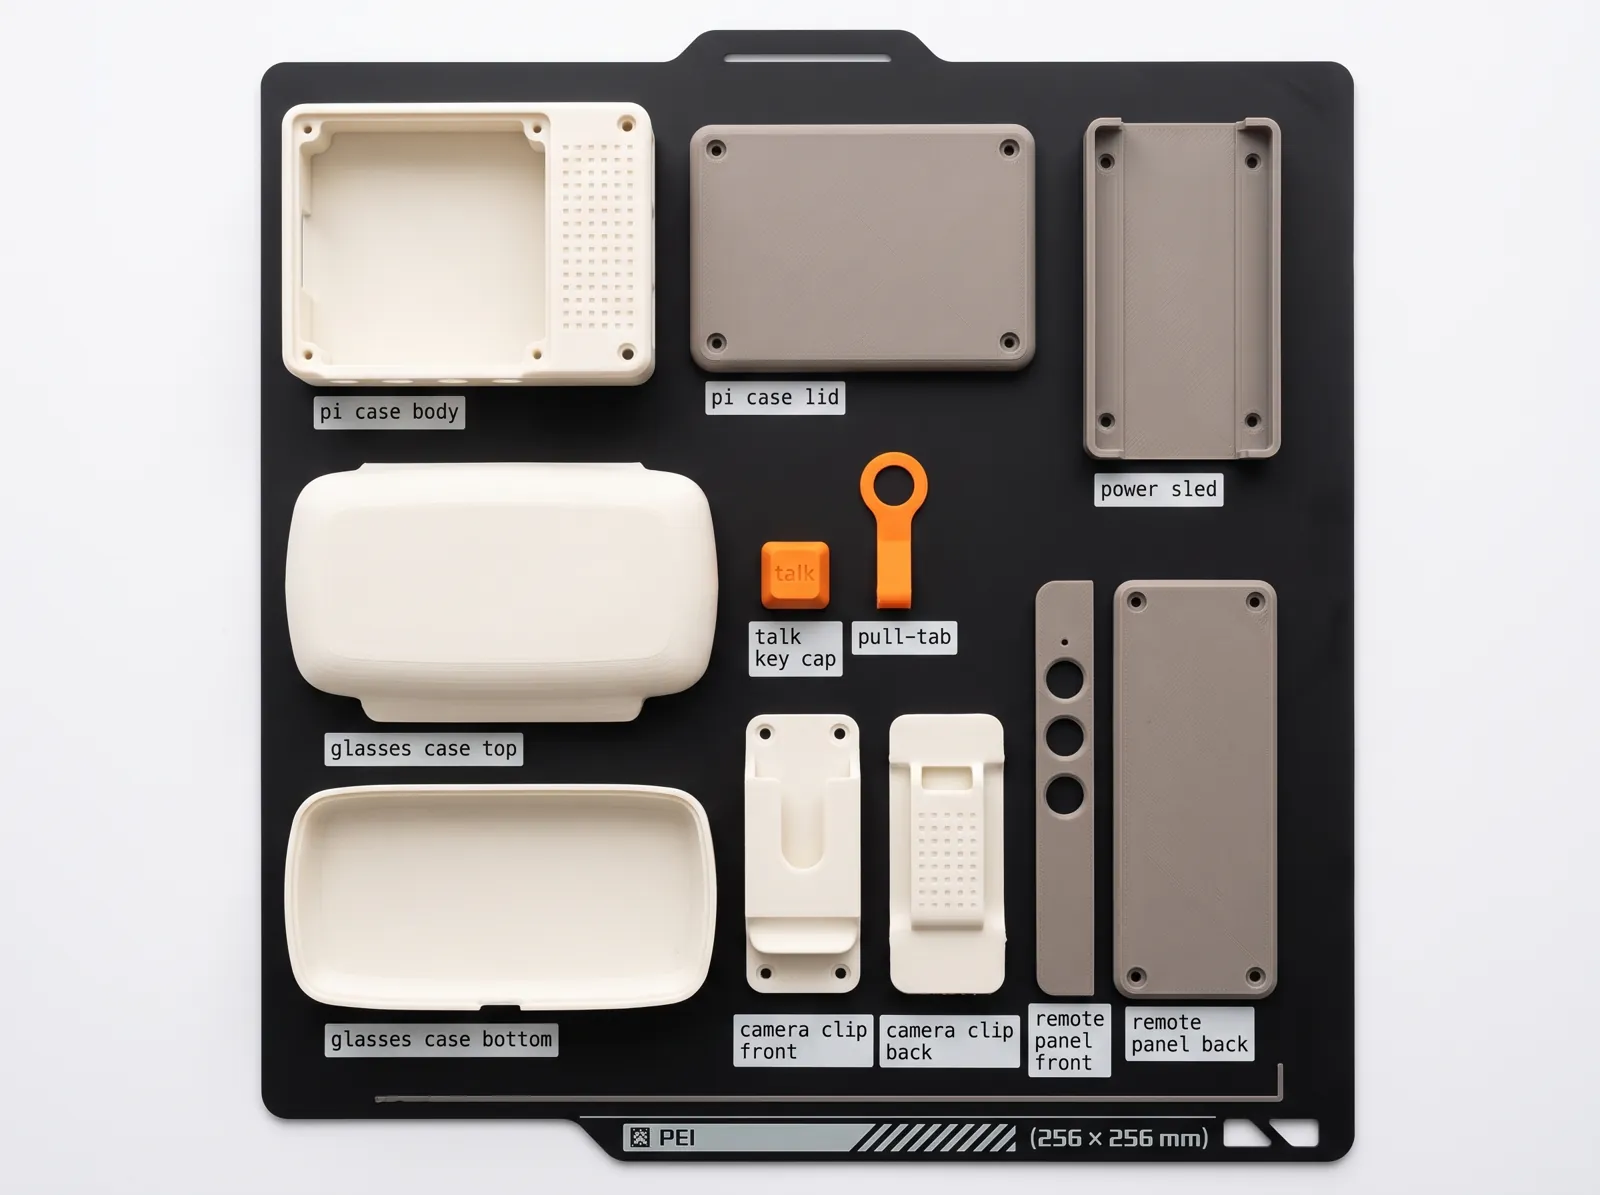
In the renders every shell fits on one 256 × 256 mm printer bed, in two filament colours plus a few small orange parts. That's the aim for the real parts too: flat faces that print without supports where they show, and screws rather than glue, so anyone with a printer can make, repair or remix their own.
Worn
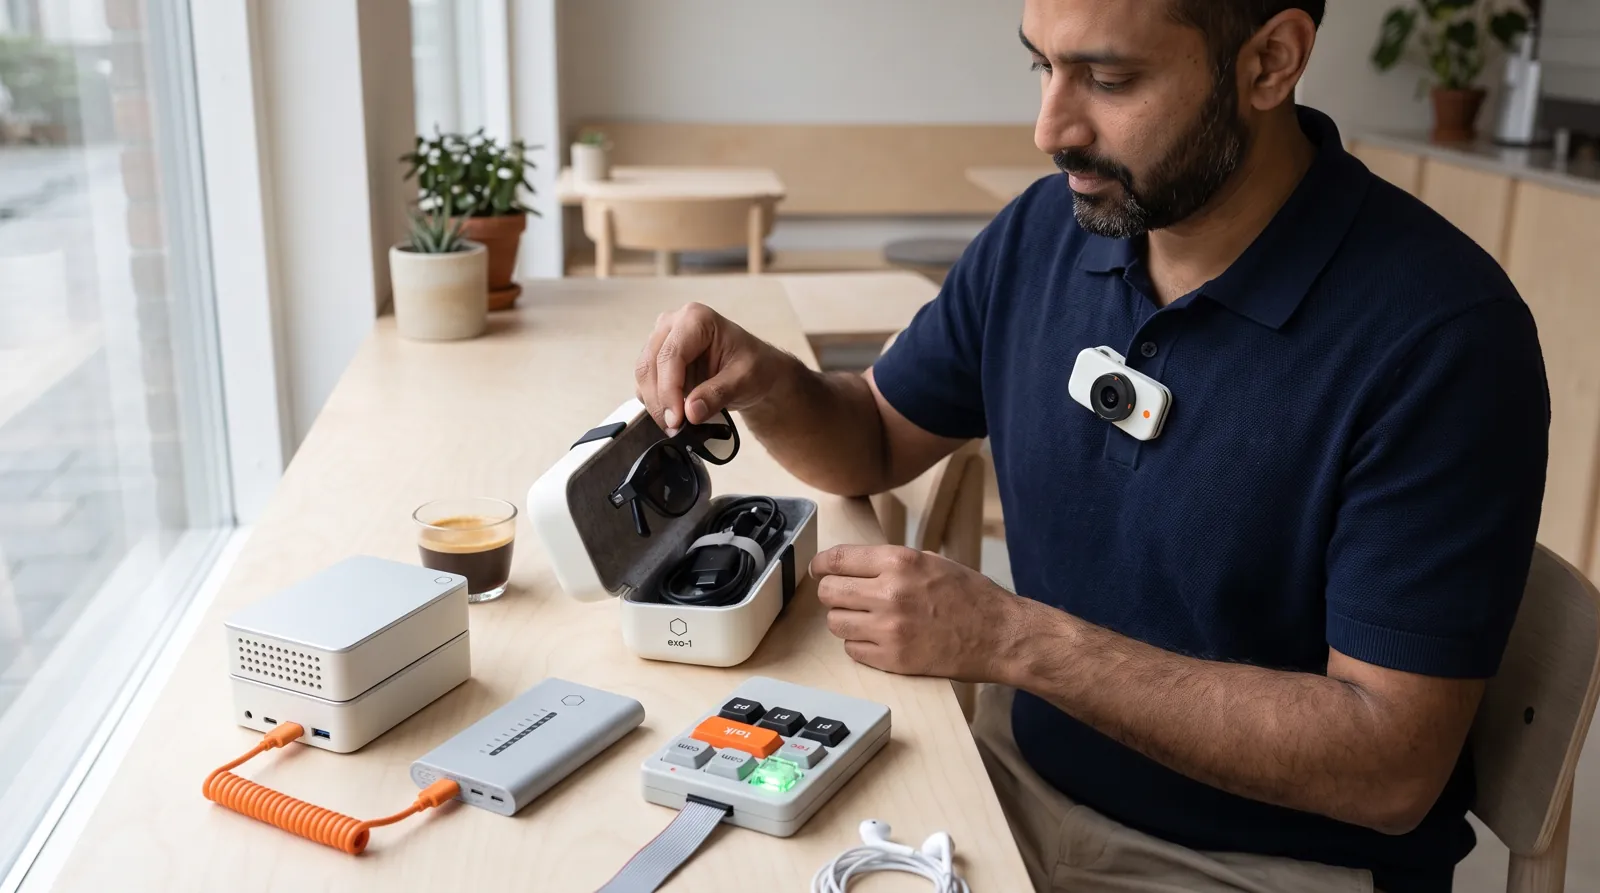
The kit is meant to disappear into what you're already wearing. The strap goes over a sweater or a jacket, the remote sits where your thumb falls, and the only bright points are the orange talk key and, when something waits for you, the green approve key.

Two visual directions
This site is set like a 19th-century scientific volume, in Argo's ink and paper. The renders explore a second direction for the hardware itself: bone, grey and one orange. We think they work together, the way a lab instrument sits on the pages of its manual, but it's an open question, and we'd like to hear which you prefer.
What's real and what's a render
| Status | |
|---|---|
| The five parts, their controls and how they're worn | Real design decisions, matching the prototype's pin map and button software |
The colours, materials, labels and the exo-1 name |
Concept. exo-1 is a working name, not a final product name |
| Every image on this page | Generated from our written design brief with an image model, with the first exploded view used as the reference for the rest so the parts stay consistent. The people are invented |
| Printed parts | Not printed yet. Small printed labels may need a second filament colour or pad printing |
| The approve key | A real part we already have: a clear mechanical keyswitch with a green LED. Its wiring to the Pi is specified and its software is written and tested |
The renders are a promise about how Exo should feel in the hand: deliberate, legible and a little playful. The next step is to print them and find out where the promise and the printer disagree.